

Table of Contents
When oyster mushrooms turn yellow, growers often immediately blame "blotch" and rush to disinfect the entire humidification system.
While cleanliness is vital, disinfection alone rarely solves the problem.
Unlike Button mushrooms (Agaricus), where Bacterial Blotch is a major crisis, Oyster mushrooms are rarely infected by the bacteria itself.
▶️Most of the time, yellowing is caused by a poor climate:
a combination of high humidity,
stagnant air (low air exchange),
and a temperature that is too low for that specific strain.
Don't fall into the trap of thinking '10°C (50°F) is fine because it worked before.'
While a cold-weather strain like K17 (for example) might thrive at that temperature, a hybrid like P80 will categorically turn yellow and die under the exact same conditions.
✅Always match your climate to the specific requirements of the strain you are growing.
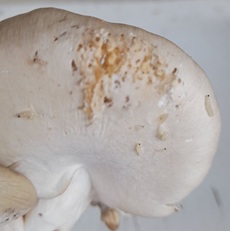
True Brown Blotch Disease is caused by Pseudomonas tolaasii, a common soil bacteria.
Symptoms: Irregularly shaped spots on the mushroom bodies, ranging from beige to rusty brown. Over time, these spots become slimy and develop a foul odor.
The spots don't have clearly defined edges because the bacteria are literally dissolving (lysing) the mushroom cells. This process is what creates the unpleasant smell.
💡Pseudomonas thrives at temperatures of 17°C (63°F) and higher.
Note: If your mushrooms are dying and turning yellow in the winter at low temperatures, it is likely not a bacterial infection, but a physiological response to stress.
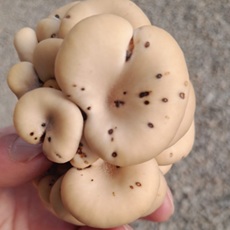
Not every spot is a disease. Look closely:
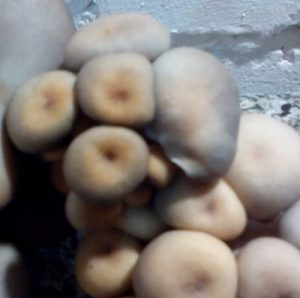
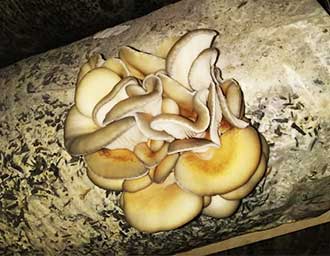
1. Dark/Black Points: Usually a sign of environmental stress, leading to poor pigment distribution in the cap. (The mushrooms in the photo are also pale yellow in color due to high humidity and low temperatures.)
2. Rusty "Pinprick" Holes: If you see tiny rusty dots (1 mm or less), these are likely damage from insect pests. Pests like fungus gnats carry bacteria on their legs. If you see these, check your substrate near the perforations for larvae and hang sticky traps immediately.
3 Large Isolated Spots (later, the entire mushroom may turn yellow): Usually caused by physical water droplets falling from the ceiling, pipes, or during manual watering. Eliminate these drips!
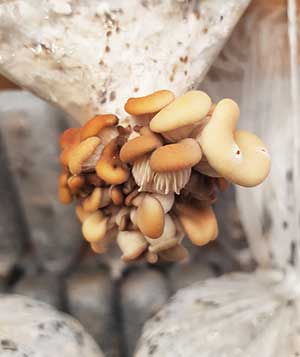
In oyster mushroom cultivation, yellowing often happens before the bacteria arrive.
It’s a chain reaction:
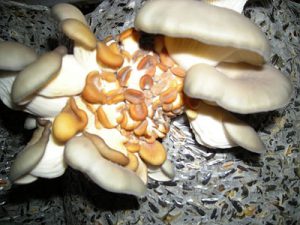 Damage like what you see in this photo usually develops on a cluster that died earlier due to failures in the humidification or heating systems.
In such cases, after the initial pins die from condensation, new mushrooms begin to grow from the very same hole, quickly overtaking the dead ones.
This creates a confusing sight: it looks as if only part of the cluster has died. In reality, you are looking at two or even three separate flushes of different ages trying to grow at once.
💡Your priority should be improving the grow room conditions, not just fighting the bacteria.
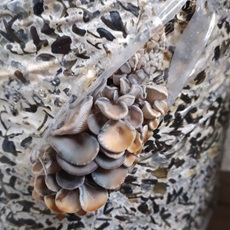
In some regions, it is common practice to water mushrooms directly.
However, if your room is at 8–10°C (46–50°F) and you use a sprayer or fogger, the droplets won't evaporate fast enough. This leads to the orange/yellow dying clusters you see in the photos.↓.
✅My Advice: If it’s cold, stop watering the mushrooms directly.
Water only the floors and walls. If you need to raise the temperature, aim a heat gun at a wet wall—this creates warm, humid air that won't dry out the mushrooms but will prevent cold-water stress.
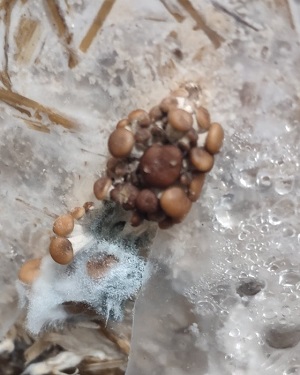
Sometimes brown spots are a result of a waterlogged substrate. If the substrate has too much "free water," bacteria develop inside.
Signs: The substrate develops foul-smelling spots and fails to fruit.
If a warm substrate is cooled too rapidly during incubation, moisture migrates toward the cold plastic film. This creates a "tropical" zone (warm and over 80% wet) between the film and the substrate—the perfect breeding ground for Pseudomonas to infect the primordia (pins).
That is, the source of yellowing of the mushrooms in this case is the contaminated substrate.
Treatment is useless here. You cannot save infected clusters with chemicals without risking the healthy ones nearby. Throw away the diseased clusters and focus on fixing your substrate preparation.
💡It often happens that after you remove the diseased clusters, the substrate moisture drops slightly—and the next flush produces a high-quality harvest.
A common winter mistake: the air is dry, so the grower turns the humidifier on and off constantly.
The Result:
The average humidity might look 'okay' on your sensors, but the rapid spikes create a dangerous 'yo-yo effect.' When the humidifier kicks in, the humidity rises so fast that it creates a false 'wetness'—the air remains physically dry, yet it becomes filled with heavy, suspended water droplets.
You will see a strange contradiction: the edges of the caps curl down (a clear sign of dryness), while the surface is simultaneously hit by moisture spikes. This constant on-and-off cycling is a guaranteed way to produce defective fruit bodies
💡Your humidification system must be stable. Fluctuations kill mushrooms faster than diseases do!
📌Read more in this article.
If the real Blotch disease periodically appears on the caps, try adding calcium chloride to the substrate.
📌Read more about adding calcium chloride.
Emoji guide: 📌 link | ✅ advice | ▶️ fact | 💡 important