
I will look at the principles of placing mushroom blocks - separately for the incubator and the growing chamber.
There is a separate article about ventilation equipment.
Table of Contents:
To properly plan a room for growing mushrooms, you first need to think about the location of the mushroom blocks.
Since this determines how the ventilation system will be located - air ducts run between the rows of blocks, and our task is to ensure good air exchange for the growth of oyster mushrooms.
If you use a single-zone growing system, you arrange the blocks the way they will bear fruit from the very beginning. If you first set up the substrate to grow mycelium in the incubator, you can use different types of block stacking in the incubator and cultivation chamber.
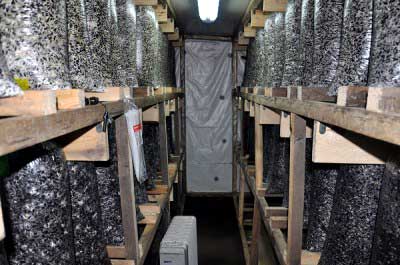
In growing rooms, the same placement methods are used as in an incubator, but taking into account the fact that each mushroom cluster must be blown with an air flow at a certain speed.
And in order to create such a flow, the blocks are hung or stacked on racks in continuous rows.
When calculating the amount of substrate in a room, take into account the height of the room.
With a two-zone system, incubation exists as a separate room in which the growth of substrate blocks occurs.
In this case, there is no need to arrange them so that each bag is blown with air. Therefore, in order to save space and heating, the blocks in this room are placed quite tightly.
The distance between blocks is 5-6 cm.
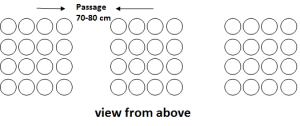
Passages between packs are 60-80 cm.
Film air ducts with nozzles (holes) are installed in these passages to ensure uniform heat removal from the blocks and create uniform humidity throughout the entire volume of the room.
If you do not have overheating of the substrate, you can make simplified ventilation - place several low-power axial fans in the passage for weak circulation and mixing of air.
This is possible when the ceiling is made of concrete slabs or has powerful beams.
If the ceiling is flimsy or you don’t want to drill it, make a welded U-shaped structure, which is attached with anchors to the floor or walls. And they connect the crossbars together.
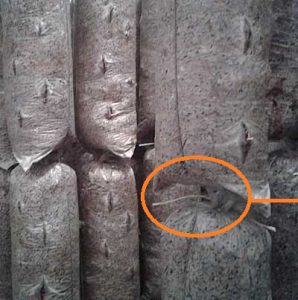
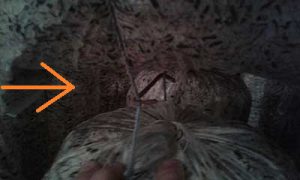
A rope is tied to the upper pipe, the bags are inserted into it and intercepted with a c-shaped hook. There is a photo of the hook below.
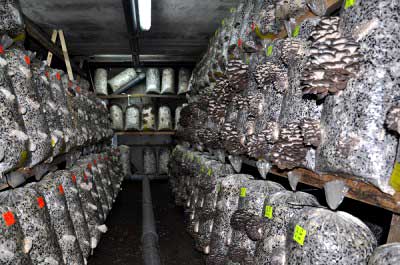
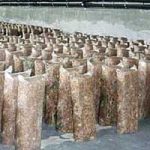
The blocks can be placed lying down or standing. If the blocks are small, weighing up to 3 kg, they are always placed on racks and most often lying down.
Shelving designs are varied:
- there are mobile racks on wheels, they are filled with bags in the inoculation room and transported to the incubator, and then, already mature, they are transported to the growing chamber. This saves the labor of workers in carrying blocks.
In such racks, blocks are placed in two rows in one tier, in three or four tiers. The same structure can be made motionless.
- some mushroom growers place blocks on racks lying down and make them 6-7 tiers in height.
It seems to me that this is not very effective:
firstly, the rack is metal-intensive, and secondly, it is inconvenient to observe the development of mycelium in the substrate. And the gain in density is very insignificant.
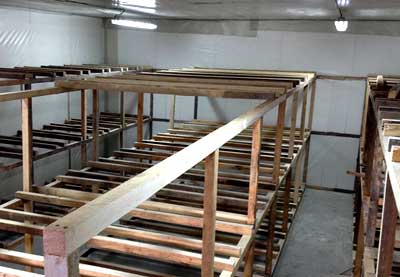
The photo below shows one of the most successful shelving designs for incubators of small mushroom production.
It is very compact, takes up little space (3x4x2m), and can accommodate 400 bags of different ages:
And here is the same design of a rack in an incubator for 900 pieces:
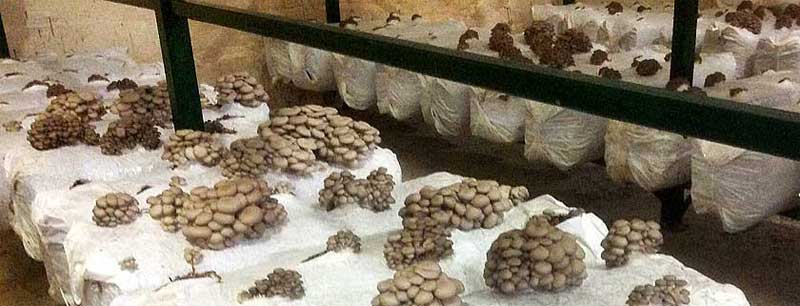
On shelves. In practice, these are also racks. They can be made like champignon (button mushroom) racks, only the tiers will be 45-50 cm high.
Vertical stand
This is a wooden block or metal pipe standing vertically, to which each block laid horizontally is tied.
Most often, this method of laying blocks is used in a growing chamber.
In the incubator, such blocks must be separated by placing wooden blocks at least 5 cm high between them.
Otherwise, in the places where the bags touch, the temperature rises to 35-40 degrees, and the mycelium there either burns out or its development proceeds abnormally, it forms a stroma.
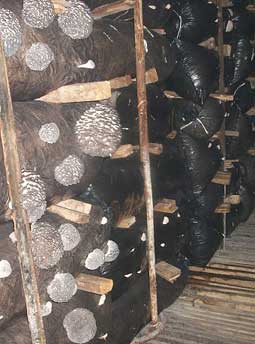
The photo shows a single-zone growing system, the appearance of primordia.
On the picture:
single-zone growth chamber, the batch was incubated lying horizontally on top of each other.
The white dense mass under the film is stroma, which was formed as a result of overheating.
The same block placement methods used in the incubation room are applied in the fruiting chamber. However, it’s essential to ensure that each fruiting block is exposed to airflow.
The substrate load per square meter of the chamber is calculated to be between 100 and 200 kg (220–440 lbs), depending on the room’s height and placement configuration.
On average, you can fit:
On 100 square feet:
The substrate load depends on several factors:
- Whether rows are single (blocks with perforation on two opposite sides) or double (blocks with perforation on one side only).
- The height of the top tier of blocks.
- Whether shelves for blocks will be placed along the walls.
Between the rows (racks) passages are made of at least 1 meter, and in the case of double rows - at least 1.15-1.2 m.
Blocks with one-sided perforation are also placed near the walls, thereby increasing the load.
Single rows require aisles at least 1 meter (3.3 feet) wide.
Double rows use space more efficiently but need aisles of 1.15–1.2 meters (3.8–4 feet) for proper airflow circulation.
Blocks with one-sided perforation can also be placed along walls to increase the room’s load capacity.
For a more accurate calculation, consider the following:
- The weight of each block.
- Whether an additional rack will be placed against the wall or the space will remain open.
- Whether recirculation and fresh air ducts are located within the room (requiring extra space) or in a separate warm corridor.
All these details are thoroughly covered in my ventilation guide (calculations in both metric and U.S. systems).
- the same as in incubation, only the rows are made either single (row-pass-row) or double with one-sided perforated blocks (pass-row - row-pass).
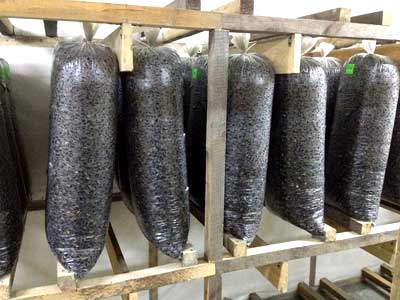
They are hung either by the tail of the bag to the welded structures, tying it around, or with twine, which is used to tie the bag. This method is applicable if the bottom of the bag rests on a pipe or other shelving element.
A common method of hanging is using a rope or twine, in three tiers, with a c-shaped hook.
The rope on which the blocks rest is tied to a hook in the ceiling or to a horizontal pipe, which is welded to vertically installed posts 1.8-2 m high.
In a row, the blocks are placed close to each other.
This is necessary to ensure that the air flow does not dissipate. From the air duct through the nozzles, the air hits the floor and rises to the bags. There it takes moisture and carbon dioxide from the mushrooms.
If there is a distance between the blocks, the air will spread chaotically, without creating the necessary climate.
Blocks are placed on racks vertically or horizontally.
These structures are made from hollow metal pipes, wooden blocks, and less often from reinforcement.
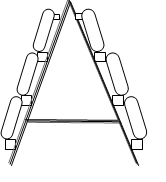
A-shaped racks are used with single-sided perforation, so that the maximum number of mushroom blocks can be placed in the growing room.
Welded structures can also be made. The bag rests on the bottom shelf and is tied at the top by the tail.
Some enterprises use shelving type racks on which mushroom blocks are placed horizontally. This is justified if it is rectangular and quite heavy - from 20 kg. weight.
Such blocks have one-sided perforation, only on the upper side.
Oyster mushroom clusters grow only upward, forming beautiful clusters weighing from 1 to 1.5 kg.
You see that there is a large distance between the tiers, and this fact is taken into account when calculating ventilation.
If your blocks are small, weighing up to 3 kg, you can arrange them in the same way as large blocks, and also use a wire structure into which the block is inserted lying down, like in a cage.
I have a book for more details on how to place blocks and calculate the amount of substrate that fits in a room. Below is a link to this book for more details.
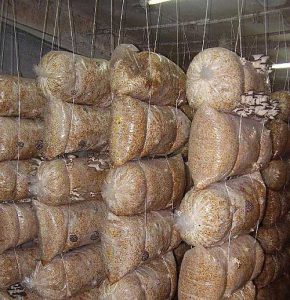
It is also possible to arrange the bags horizontally on the rope, using the same C-shaped brackets, only in this case you need two of them - one from each edge of the bag.
This design is quite unstable and can fall on its side. Therefore, it is better not to save wire and intercept each row with staples.
This arrangement can be advantageous if the areas are large and private.
If the mushroom blocks are placed on the floor, ventilation is simplified.
The air volume in the room is sufficient, so for good mushroom growth it is enough to simply disperse the flow with axial fans.
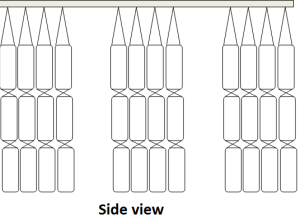
In this case, the blocks are installed in rows, standing (vertically), so that the slots face the aisles.
One pass is made wide. People walk along it, picking mushrooms. Then place three strips of blocks as described below
A row of bags is placed near the aisle, 30-40 cm are set back so that the clusters have room to grow, and another row is placed. Again they cut back 30-40 cm, put another row and then make a wide passage.
If the bags are not stable enough on the floor, they are lightly supported on each other, or tied by the “tail” to the guide rails.
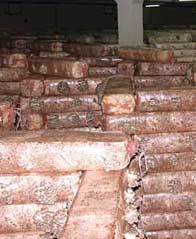
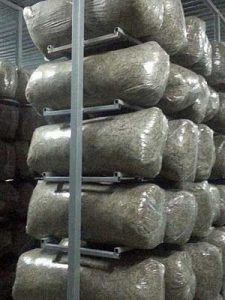
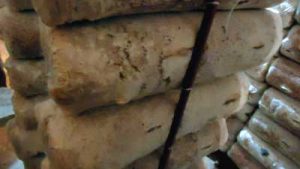
Some enterprises produce flat rectangular blocks, which are simply stacked 6-7 pieces high.
This arrangement of bags allows you to do without air ducts. Humidification equipment is often not installed - simply watering the concrete floors is enough. Especially if it is a basement or vegetable storage.
The result is stacks approximately 1.2-1.3 meters high.
The loading of the chamber is low, and on top, above the bags, there is a fairly large air gap.
To independently calculate the location of the blocks and choose one of 4 ways to place them, you can purchase my manual.
It also contains ready-made tables with already calculated fan power and air duct diameters. They are suitable for rooms with a total load of one to eight tons of substrate.
The tables are accompanied by a ventilation diagram and calculation of the location of double and single rows of blocks - horizontal and vertical.
Read more here