

Table of Contents:
While this article focuses on the placement of oyster mushroom blocks, remember that layout is the very heart of your grow room’s design. There is an inseparable link between your substrate and your air:
Layout dictates Ventilation: Your ventilation system must be built around your blocks. Since air ducts must run precisely between the rows to ensure efficient gas exchange, you cannot design your airflow until you know exactly where your bags will stand.
Ventilation dictates Layout: Conversely, if you are moving into a facility with an existing ventilation setup, your block arrangement must be strictly adapted to that airflow.
In short, your blocks and your ventilation are two halves of the same system. To achieve high yields, they must be perfectly synchronized.
If you use a two-zone system, I have a separate article detailing incubator block placement, where high-density stacking is the priority. However, whether you are moving colonized blocks from an incubator or operating a single-zone system from the start, once you enter the fruiting (grow) room, the rules change completely.
▶️Now, every single cluster must receive a specific flow of fresh, humidified air to develop correctly.
Learn more about:
📌Incubator Layout for Oyster Mushrooms
📌What is a single and two-zone growing system?
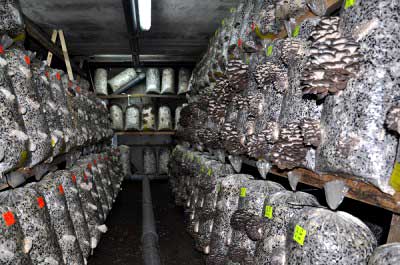
To ensure the ventilation system works effectively, air ducts are usually placed directly between the rows of blocks. Your layout determines your airflow.
To maximize your room's capacity, blocks with one-sided perforation can also be placed directly against the walls. This setup increases the overall substrate load of the chamber without compromising the growth of your clusters, provided you maintain proper airflow in the central aisles.
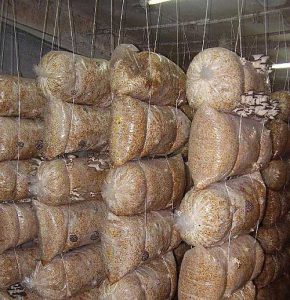
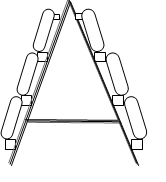
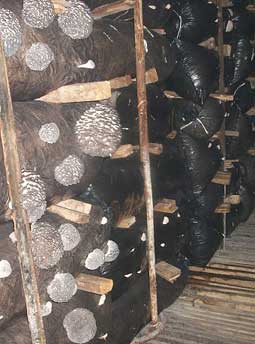
Just like in the incubator, hanging is a popular choice. For a detailed look at the hanging process and how to use C-hooks (as in the photo↓), refer to my incubator article. This method is highly versatile, allowing you to securely suspend blocks ranging from 3 kg to 15 kg (7 to 33 lbs).
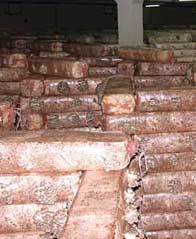
However, in the fruiting room, blocks in a row should be placed close to each other.
Why? This prevents the air from the nozzles from dissipating chaotically. The air hits the floor, rises along the solid "wall" of blocks, and picks up CO₂ and moisture along the way.
The rope on which the blocks rest is tied to a hook in the ceiling or to a horizontal pipe, which is welded to vertically installed posts 1.8-2 m high.
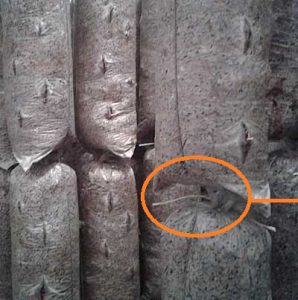
You can also hang bags horizontally using a rope or twine and the same C-shaped hooks. In this case, you’ll need two hooks—one for each end of the bag—to keep it level.
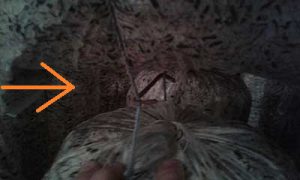
⚠️A word of caution:
this setup can be quite unstable, and bags may tilt or fall.
To prevent this, don't skimp on the wire; use extra staples or clips to 'lock' each row in place and keep your blocks steady
Racks can be made from metal pipes or wood.
Some large plants use shelving type racks on which mushroom blocks are placed horizontally. This is justified if it is rectangular and quite heavy - from 20 kg. weight.
Such blocks have one-sided perforation, only on the upper side.
Oyster mushroom clusters grow only upward, forming beautiful clusters weighing from 1 to 1.5 kg.
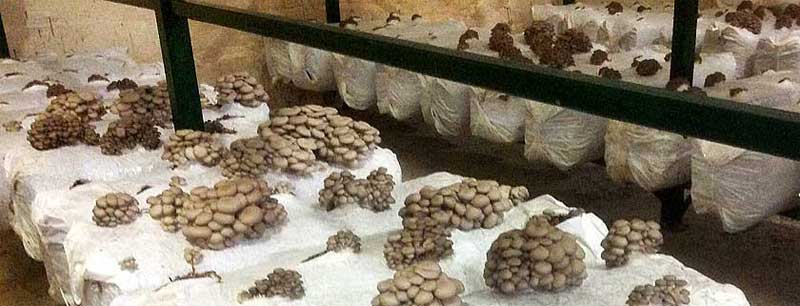
You see that there is a large distance between the tiers, and this fact is taken into account when calculating ventilation.
For small blocks (3 kg or less), perforated shelves are the gold standard.
 For smaller, lighter bags, you can choose the method that best fits your workflow.
Some growers prefer using wire 'cages' or suspended ropes for lateral fruiting, while others find that shelves provide more stable support.
✅If you prefer working with shelves, I highly recommend using mesh or perforated designs.
This allows air to circulate under the bags, preventing moisture buildup and ensuring that CO2 is effectively flushed out from underneath the blocks.
4. Floor Placement (The Low-Tech Option)
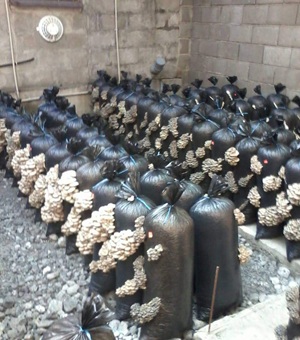
If you have a large basement or vegetable store with high ceilings, you can place blocks directly on the floor in rows. This simplifies ventilation, as you can often use axial fans to simply "disperse" the air.
If you arrange your blocks in groups of two or three rows, you must leave a wide aisle of 30–40 cm (12–16 inches) between these groups.
This ensures that you have enough space to walk through and, crucially, that the mushroom clusters have room to grow to their full size without hitting the bags in the opposite row.
If you want to skip the guesswork and get a precise plan for your grow room, you can purchase my complete manual.
It includes ready-to-use tables with pre-calculated fan power and air duct diameters tailored for rooms with a substrate load of 1 to 8 tons.
The manual also features detailed ventilation diagrams and specific calculations for both horizontal and vertical layouts in single and double-row configurations.
📌All these details are thoroughly covered in my ventilation guide (calculations in both metric and U.S. systems).
Emoji guide: 📌 link | ✅ advice | ▶️ fact | 💡 important | ⚠️ warning